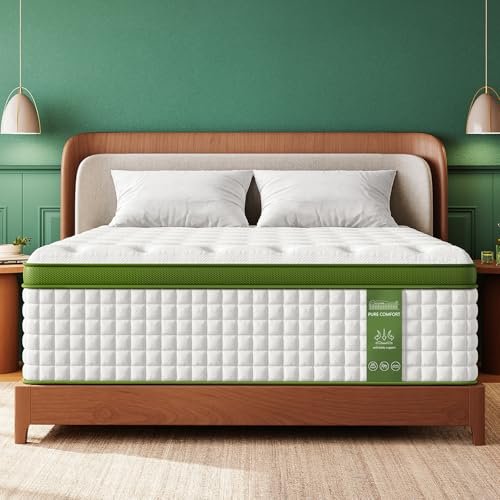
Seamless Sleep: Your Easy Guide on How to Attach a Bed Frame to a Headboard
Moving into a new home, upgrading your bedroom, or simply reconfiguring your sleeping space? One common task that often stumps even the handiest DIYers is figuring out how to attach a bed frame to a headboard. While it might seem like a daunting puzzle, we promise it’s a straightforward process that you can absolutely master!
A securely attached headboard doesn’t just complete the aesthetic of your bed; it also provides stability, prevents rattling, and keeps your pillows from escaping into the abyss behind your bed. Ready to transform your sleep sanctuary? Let’s dive in!
Why Attach Your Headboard to Your Bed Frame?
Before we get to the “how,” let’s quickly cover the “why.” A properly attached headboard offers several benefits:
- Stability: No more wobbly or rattling headboards when you shift in bed.
- Protection: It prevents your headboard from scratching your wall.
- Aesthetics: A unified look makes your bed appear more polished and complete.
- Safety: Reduces the risk of the headboard tipping or falling, especially in homes with active children or pets.
Before You Begin: What You’ll Need
Preparation is key to a smooth assembly. Gather these items before you start:
- Your Headboard: The star of the show!
- Your Bed Frame: Ready to be united.
- Appropriate Hardware: This is crucial! Most headboards and bed frames come with pre-drilled holes and should include the necessary bolts, nuts, and washers. Always check your manufacturer’s instructions and hardware packs first. If not included or lost, you’ll need carriage bolts, nuts, and washers (typically 1/4″, 5/16″, or 3/8″ diameter, and varying lengths – measure your holes!).
- Tools:
- Wrench or Ratchet Set: To tighten nuts and bolts.
- Screwdriver (Phillips or Flathead): Depending on your specific hardware.
- Measuring Tape: Helpful for alignment and checking bolt lengths.
- Work Gloves: To protect your hands.
- A Helper: While often possible alone, an extra set of hands makes positioning and aligning much easier, especially with heavier headboards.
Pre-Assembly Checks & Preparations
- Read the Instructions (Seriously!): If your headboard or bed frame came with instructions, review them thoroughly. They’ll provide specific details about your model’s unique attachment points and hardware.
- Identify Connection Points: Most bed frames have vertical brackets or plates at the head of the bed, designed to connect to your headboard. Your headboard will have corresponding pre-drilled holes.
- Clear Your Space: Move furniture, rugs, and anything else that might get in your way. You’ll need room to maneuver both the headboard and the frame.
- Protect Your Floors: If working on hardwood or delicate flooring, lay down a blanket or moving pads.
Step-by-Step Guide: Attaching Your Bed Frame to a Headboard
Ready? Let’s get that bed ready for its close-up!
Step 1: Position the Headboard and Frame
- Stand your headboard upright against the wall where you want your bed to be. Ensure it’s stable and won’t tip over.
- Bring your bed frame (without the mattress yet!) into position. Slide the head end of the bed frame close to the headboard, aligning the vertical attachment brackets on the frame with the lower back of the headboard.
Step 2: Align the Brackets/Holes
- This is where a helper really shines! With one person stabilizing the headboard, the other can maneuver the bed frame until the pre-drilled holes on the frame’s brackets perfectly line up with the holes on the headboard.
- Important Tip: Many bed frames have multiple sets of holes on their brackets, allowing for height adjustment. Choose the holes that provide your desired headboard height and stability. Generally, using as many connection points as possible provides the most secure attachment.
Step 3: Insert the Bolts
- Once the holes are aligned, insert the bolts (typically carriage bolts, where the head is smooth and round) from the outside of the bed frame bracket, through the bracket, and then through the headboard.
- Push the bolt all the way through until the head is flush against the frame bracket. You might need to wiggle things slightly to get the bolts through all layers.
Step 4: Secure with Washers and Nuts
- On the inside of the headboard (where the bolt emerges), first place a washer onto the bolt. Washers help distribute pressure and prevent the nut from digging into the wood or fabric.
- Next, thread the nut onto the bolt. Start by hand-tightening to ensure you don’t cross-thread it.
- Repeat this process for all available connection points on both sides of the bed frame. Even if your headboard only has holes for two bolts per side, and your frame has more, use all the compatible ones.
Step 5: Tighten Everything Up
- Once all bolts, washers, and nuts are in place and hand-tightened, grab your wrench or ratchet set.
- Carefully tighten each nut. You want them to be snug and secure, but do not overtighten! Overtightening can strip the threads, crack the wood, or damage the headboard.
- Work systematically, tightening each bolt a little at a time, then going back to give them a final snug turn. The goal is a firm, stable connection with no wiggle.
Step 6: Double-Check and Test
- After tightening everything, gently push and pull on the headboard and frame to ensure there’s no movement or wobbling.
- Visually inspect all connections to make sure bolts are fully inserted and nuts are tight.
- If everything feels solid, you’re all set to place your mattress and bedding!
Troubleshooting Common Scenarios & Tips
- “My Holes Don’t Align!”
- Adapter Plates: Many hardware stores sell universal headboard adapter plates or conversion brackets. These often have multiple hole patterns and can bridge the gap between misaligned frames and headboards. This is usually the best solution.
- Drilling (Use Caution!): If adapter plates aren’t an option and you’re confident in your DIY skills, you could carefully drill new holes in your headboard. However, this should be a last resort. Measure precisely, use a drill bit slightly larger than your bolt diameter, and consider reinforcing the holes if drilling into particleboard. Do NOT drill into your metal bed frame.
- “My Headboard is Too Low/High!”
- As mentioned in Step 2, most bed frames have multiple hole options on their brackets to allow for height adjustment. Experiment with different hole sets before tightening to find your ideal height.
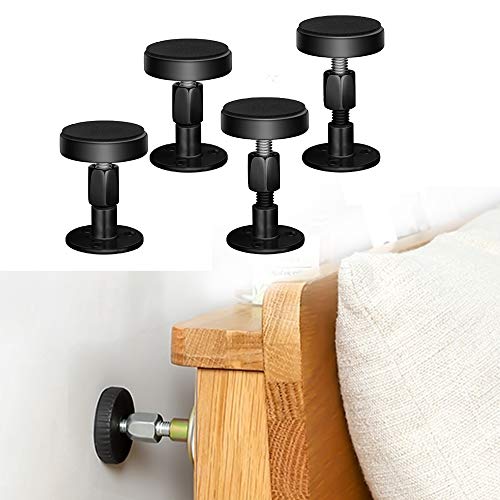
- “The Connection Feels Wobbly.”
- Retighten everything. Sometimes a half-turn is all it takes.
- Check for missing washers.
- Consider lock washers: If your hardware didn’t include them, lock washers can help prevent nuts from loosening over time due to vibrations.
- “I Don’t Have the Right Hardware.”
- Take your bed frame bracket and headboard to a local hardware store. Their staff can help you identify the correct size and type of bolts, nuts, and washers you’ll need. Bring one of the bolts if you have one, or measure the diameter of the holes.
Common Mistakes to Avoid
- Forcing Misalignment: Never try to force bolts into holes that don’t perfectly align. This can strip threads, damage the holes, or weaken the connection.
- Overtightening: “Tighten until it strips, then back off a quarter turn” is not the motto here! Snug is good; over-tightening can damage your furniture.
- Undertightening: A loose connection will lead to a wobbly, noisy, and potentially unsafe headboard.
- Ignoring Manufacturer Instructions: They’re there for a reason! Your specific bed frame or headboard might have unique requirements.
- Using Incorrect Hardware: Bolts that are too long will protrude unsafely; bolts that are too short won’t provide a secure connection. Incorrect diameters will lead to wobbly fits or inability to insert.
- Working Alone with a Heavy Headboard: Not only is it difficult, but it also poses a risk of dropping and damaging the headboard or injuring yourself.
Maintenance Tips
Once your bed frame and headboard are securely attached, give them a quick check every few months. Vibrations from daily use can sometimes cause nuts to loosen slightly. A quick retightening will keep your bed feeling brand new and stable for years to come.
Sweet Dreams Await!
Congratulations! You’ve successfully attached your bed frame to your headboard, creating a stable, stylish, and comfortable foundation for your sleep. With this guide, you’re not just assembling furniture; you’re crafting the perfect backdrop for sweet dreams and restful nights. Enjoy your beautifully put-together bed!
Frequently Asked Questions(FAQ)
Q. Why should I attach my bed frame to my headboard?
A. Attaching your bed frame to your headboard creates a sturdy, cohesive unit, preventing the headboard from leaning against the wall, rattling, or shifting. This eliminates noise, protects your wall from scuffs, and provides a more stable and comfortable sleeping experience.
Q. What tools and hardware will I likely need for this task?
A. Common tools include a wrench or socket set (to match your nuts), an Allen key (hex key) if using hex bolts, a screwdriver (Phillips or flathead), and possibly a drill if new holes are needed. Hardware typically includes appropriately sized bolts (often carriage bolts or hex bolts), flat washers, lock washers, and nuts (wing nuts or hex nuts) that match the bolt size and fit the existing holes.
Q. How do I know what size bolts to use?
A. The bolt size (diameter and length) depends on the existing holes in your bed frame’s brackets and headboard legs. Measure the diameter of the holes; the bolt should pass through easily but not be too loose. The length should be sufficient to pass through both the frame bracket and the headboard leg, with enough thread exposed for a flat washer, a lock washer, and the nut to securely tighten, typically allowing for about 1/2 to 1 inch of thread engagement.
Q. What if my bed frame and headboard don’t have pre-drilled holes that align?
A. This is a common issue. You have several options:
* Adapter Plates/Brackets: Purchase universal headboard attachment brackets or adapter plates. These metal plates typically bolt to your bed frame and provide new, adjustable attachment points for your headboard.
* Drill New Holes: If the headboard material is solid wood and you’re comfortable, you can carefully measure, mark, and drill new holes in the headboard legs or frame brackets to achieve alignment. Use the appropriate drill bit size for your chosen bolts.
* Wood Reinforcement: For wooden headboards, sometimes attaching a piece of wood to the headboard leg can provide a new, accessible point for drilling and attachment.
Q. Can I attach any bed frame to any headboard?
A. While most standard bed frames and headboards of the same size (e.g., Queen frame to Queen headboard) are designed with some level of compatibility, variations exist. Factors like specific pre-drilled hole alignment, the headboard’s width relative to the frame, and the material/design of the headboard legs can affect a direct, easy attachment. Fortunately, adapter plates and universal brackets can resolve most compatibility issues.
Q. What’s the typical step-by-step process for attaching them?
A.
1. Position: Stand the headboard upright against the wall (or in its final position) and bring the bed frame into place, aligning the headboard attachment brackets on the frame with the legs of the headboard.
2. Align Holes: Adjust the height of the frame brackets to align with the pre-drilled holes in the headboard legs.
3. Insert Bolts: Pass the chosen bolts through the holes in the bed frame brackets and then through the corresponding holes in the headboard legs.
4. Add Hardware: On the inside of the headboard leg, place a flat washer, followed by a lock washer, and then thread on the nut.
5. Tighten: Hand-tighten all nuts first to ensure everything is aligned. Then, use your wrench or socket to fully tighten them, alternating between bolts to ensure even pressure. Aim for a snug and secure fit without over-tightening.
Q. My headboard is upholstered. How do I attach the bed frame without damaging it?
A. Upholstered headboards typically have exposed wooden legs or posts designed for attachment. The process is the same as for non-upholstered headboards, as the attachment points are on the solid structure beneath the fabric. If the attachment points are covered, you might need to carefully make small, strategic incisions in the fabric to access the holes, or use adapter plates that extend past the upholstered edge.
Q. Should I use lock washers or just flat washers?
A. It is highly recommended to use both a flat washer and a lock washer (or a self-locking nut) with each bolt and nut. The flat washer distributes the pressure of the nut over a wider surface, preventing damage to the headboard or frame. The lock washer provides added security by resisting loosening due to vibrations and everyday movement, helping the connection stay tight over time.
Q. How tight should I make the bolts?
A. Tighten the bolts firmly until there is no noticeable wobble or play between the frame and headboard. The connection should feel solid. However, be careful not to over-tighten, especially if attaching to wooden headboard legs, as this can strip the wood, compress it excessively, or cause the bolt to sink into the material, potentially leading to damage. A secure, snug fit is the goal.
Q. What if my headboard is too wide or too narrow for my bed frame?
A. If your headboard’s attachment holes don’t align because it’s too wide or too narrow for your bed frame’s brackets, you’ll need specific hardware:
* Headboard Extenders/Widening Brackets: These specialized metal plates attach to your bed frame’s existing brackets and extend outwards or inwards, providing new attachment points that can reach the headboard’s holes. They come in various lengths and offsets.
* Universal Adapter Plates: Some adapter plates offer multiple slots or a range of holes, providing flexibility to bridge different widths and compensate for misalignment.
Related Articles
7 Top Full Size Bed Frames: What is the Dimensions of a Full Size Bed Frame and More!
Getting a good night’s sleep often starts with the right bed, and for many, a full-size bed is the perfect sweet spot between a twin and a queen…
How Much Is a King Size Sleep Number Smart Bed
How Much Is a King Size Sleep Number Smart Bed? Your Guide to Understanding the Investment Recommended Product: Select Comfort Air Bed Chamber for Sle…
How Much Does a Sleep Number 360 Smart Bed Cost
How Much Does a Sleep Number 360 Smart Bed Cost? Recommended Product: Sven & Son Classic Adjustable Bed Base — head and foot lift, massage, under-…