Your Ultimate Guide: How to Seamlessly Connect Your Headboard to a Metal Bed Frame
So, you’ve got your beautiful new headboard, or perhaps you’re finally getting around to attaching that existing one to your sturdy metal bed frame. It might seem like a daunting task with all those nuts, bolts, and brackets, but we promise it’s a straightforward DIY project that anyone can tackle! Connecting your headboard isn’t just about aesthetics; it’s about stability, comfort, and completing the look of your bedroom.
This friendly, step-by-step guide will walk you through the process, offering helpful tips and pointing out common pitfalls to ensure your headboard is perfectly attached and rock-solid. Let’s get started!
Why Connect Your Headboard? More Than Just Looks!
Before we dive into the “how,” let’s quickly touch on the “why”:
- Aesthetics: A headboard completes your bed’s design, making your bedroom feel more polished and inviting.
- Comfort: It provides a comfortable backrest for reading or watching TV in bed, protecting your wall from scuffs.
- Stability: A properly attached headboard prevents it from wobbling, banging against the wall, or shifting during the night.
- Pillow Support: Keeps your pillows from slipping off the back of the bed.
What You’ll Need: Your DIY Toolkit
Gathering your tools before you start will make the process much smoother. You likely have most of these lying around!
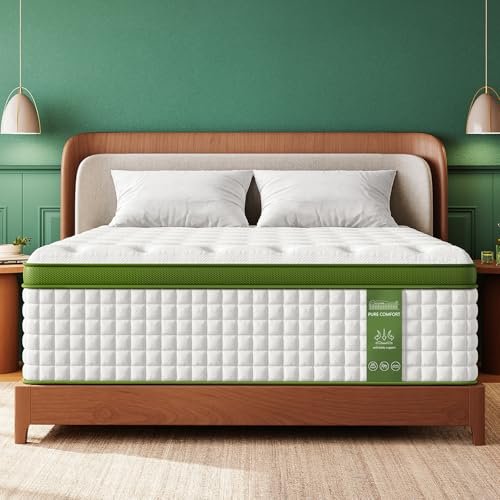
- Your Headboard: The star of the show!
- Your Metal Bed Frame: The sturdy foundation.
- Connecting Hardware: This is crucial. Your headboard or bed frame usually comes with bolts, washers, and nuts specifically designed for this purpose. If not, don’t worry – we’ll address that in troubleshooting. Always check your original packaging first!
- Wrench or Pliers: For tightening nuts and bolts. An adjustable wrench is often sufficient.
- Screwdriver (Phillips or flathead): Depending on the bolt types.
- Measuring Tape (Optional but helpful): For checking alignment if needed.
- A Helper (Highly Recommended!): An extra set of hands can make aligning and holding the headboard much easier, especially for larger or heavier headboards.
- Flashlight (Optional): To see into tight spaces.
Step-by-Step Guide: Attaching Your Headboard Like a Pro
Follow these instructions carefully, and you’ll have a beautifully connected headboard in no time!
Step 1: Clear the Area and Prepare Your Space
Safety first! Move your bed frame away from the wall to give yourself ample room to work around the head of the bed. Remove any bedding, pillows, or mattresses from the frame for easier access to the connection points.
Step 2: Identify Your Connection Points
Most metal bed frames have vertical plates or brackets at the head of the bed, each with multiple pre-drilled holes. Your headboard will also have corresponding attachment points, usually legs with pre-drilled holes.
- Match them up visually. The goal is to find holes on the headboard legs that align perfectly with holes on the bed frame brackets. Don’t worry if they don’t all align – you usually only need a few sturdy connections on each side.
Step 3: Position the Headboard and Align the Holes
This is where a helper comes in handy!
- Have your helper (or carefully do it yourself) stand the headboard upright at the head of your bed frame.
- Align the headboard’s legs with the vertical attachment plates on your metal bed frame.
- Carefully adjust the height of the headboard until the holes on its legs line up with the holes on the bed frame brackets. You might need to slide the headboard up or down slightly. This alignment is key!
Step 4: Insert the Bolts
Once you’ve found a good alignment:
- Start with one side. Insert a bolt through the aligned holes from the outside of the headboard leg, through the headboard leg, and then through the bed frame bracket.
- Push the bolt all the way through so the threaded end comes out on the inside of the bed frame bracket.
- Repeat this for at least two bolts on each side of the headboard. Using at least two per side ensures better stability and prevents rotation.
Step 5: Add Washers and Nuts
Now it’s time to secure those bolts:
- On the inside of the bed frame bracket, where the bolt’s threaded end is exposed, first place a washer onto the bolt. Washers help distribute pressure and prevent the nut from digging into the metal.
- Next, thread a nut onto the bolt.
- Hand-tighten the nut as much as you can. This will hold the headboard in place while you repeat the process on the other side.
Step 6: Hand-Tighten All Connections
Before you grab your wrench:
- With all the bolts, washers, and nuts in place, go around and hand-tighten every single connection as much as possible. This ensures everything is snug and ready for the final tightening.
Step 7: Final Tightening with Your Tools
This is where you make it sturdy:
- Using your wrench or pliers (and a screwdriver if your bolts require it to prevent spinning), tighten each nut and bolt securely.
- Do not over-tighten! You want them snug and firm, but over-tightening can strip the threads or damage the frame/headboard. A good rule of thumb is to tighten until there’s no more give, then give it a final quarter-turn.
- Check both sides and all connections to ensure they are equally tight.
Step 8: Test for Stability
- Gently wiggle the headboard from side to side.
- It should feel solid and secure, with no noticeable wobble or rattling. If it feels loose, re-check your connections and tighten further if needed.
Step 9: Reassemble and Enjoy!
- Once you’re satisfied with the stability, push your bed frame back into its desired position.
- Put your mattress, box spring (if applicable), and bedding back on.
- Stand back and admire your perfectly connected headboard!
Troubleshooting Common Headboard Connection Issues
Don’t panic if things aren’t lining up perfectly. Here are solutions to common problems:
- Mismatched Holes: This is the most frequent issue. Your headboard holes might not align with your bed frame holes, or there aren’t enough holes for a secure connection.
- Solution: You’ll need a headboard bracket adapter plate (sometimes called conversion brackets or extension plates). These are universal metal plates with a variety of holes that attach to your existing bed frame holes and provide new holes to match your headboard. They are readily available online or at hardware stores.
- Missing Hardware: You bought a used headboard or lost the original bolts.
- Solution: Take one of the headboard’s leg brackets or the bed frame’s attachment plate to a hardware store. An employee can help you find appropriate bolts, nuts, and washers that fit the hole size and length you need.
- Wobbly Headboard: Even after tightening, it feels unstable.
- Solution: Double-check all connections. Ensure washers are in place. If using an adapter plate, ensure it’s securely attached to both the headboard and the frame. Sometimes, adding an extra bolt if there’s an available hole can help.
- Squeaking or Rattling: Annoying noises can disrupt your sleep!
- Solution: Loosen and re-tighten the bolts. Sometimes, a tiny bit of movement can cause noise. Consider adding felt pads or rubber washers between the metal surfaces at the connection points to absorb vibrations and prevent metal-on-metal squeaks.
Pro Tips for a Perfect Connection
- Read Any Included Instructions: While this guide is comprehensive, always glance at any instructions that came with your specific headboard or bed frame. They might have unique tips.
- Don’t Rush: Take your time, especially during the alignment phase. Patience pays off.
- Clean Threads: Before assembling, ensure the bolt threads and nut interiors are clean and free of debris for a smooth fit.
- Check Periodically: Over time, bolts can loosen. It’s a good idea to re-tighten your headboard connections every 6-12 months to maintain stability.
- Consider Height Adjustment: Many headboards offer multiple hole options for height adjustment. Before final tightening, ensure your headboard is at your preferred height relative to your mattress.
Common Mistakes to Avoid
- Forgetting Washers: Washers are not just for show; they prevent damage to your headboard/frame and help distribute pressure, making the connection more secure.
- Leaving Bolts Loose: A loose headboard is a wobbly, noisy, and potentially damaging headboard. Always tighten everything securely.
- Forcing Mismatched Parts: If holes don’t align, don’t try to force bolts through or drill new holes without proper guidance. This can damage your items. Opt for an adapter plate instead.
- Over-tightening: While you want it snug, going too far can strip the bolt threads, warp the metal, or crack the headboard material. Tighten until firm, not until it groans!
- Ignoring Squeaks or Wobbles: These are warning signs. Address them immediately to prevent further loosening or potential damage.
- Working Alone with a Heavy Headboard: Not only can this be difficult, but it also carries a risk of dropping the headboard and causing injury or damage. Enlist help for heavy items.
Conclusion: Sweet Dreams with a Stable Headboard!
Congratulations! You’ve successfully connected your headboard to your metal bed frame. This simple DIY project not only enhances the look of your bedroom but also ensures a more comfortable and stable sleeping environment. With your headboard now securely in place, you can finally rest easy (and stylishly!). Enjoy your completed bedroom sanctuary!
Frequently Asked Questions(FAQ)
Q. What is the first step to connecting a headboard to a metal bed frame?
A. The first step is to check for compatibility. Most metal bed frames have pre-drilled holes or dedicated brackets at the head of the frame designed for headboard attachment. Compare these holes to the pre-drilled holes or attachment points on your headboard.
Q. What tools and hardware will I typically need for this connection?
A. You will generally need a wrench (adjustable or a set of specific sizes), a screwdriver (Phillips or flathead, depending on your hardware), and possibly a measuring tape. For hardware, you’ll need bolts, washers, and nuts that fit the holes on both your headboard and bed frame, or an appropriate headboard bracket kit.
Q. What if my headboard and metal bed frame do not have matching attachment holes?
A. If the holes don’t align, you will need to purchase a universal headboard bracket or adapter kit. These kits are designed to bridge the gap between mismatched hole patterns and often include extension plates and various bolt sizes to accommodate different configurations.
Q. Can I connect a wooden headboard to a metal bed frame?
A. Yes, absolutely. Most wooden headboards are designed with pre-drilled holes or slots for attachment. You’ll connect them to your metal bed frame using the appropriate bolts or a universal bracket kit if the holes don’t align directly.
Q. How do I ensure the headboard is stable and doesn’t wobble after connection?
A. To ensure stability, make sure all bolts are securely tightened with a wrench. Use washers on both sides of the frame and headboard connections to distribute pressure and prevent loosening. Periodically check and retighten the bolts, especially after moving the bed.
Q. Are there different types of headboard brackets, and which one should I use?
A. Yes, common types include standard brackets (often included with frames), universal adapter plates (for mismatched holes), and extension brackets (to adjust width or height). Choose a universal adapter if your frame and headboard holes don’t align, or extension brackets if you need to adjust the headboard’s position relative to the frame.
Q. How do I properly align the headboard with the bed frame?
A. First, center the headboard horizontally with your bed frame. Most bed frames offer some vertical adjustment for the headboard attachment points; choose a height that comfortably supports your pillows and looks aesthetically pleasing. Use a level if precision is important.
Q. My headboard is wider than my metal bed frame. How can I still connect it?
A. If your headboard is significantly wider than your bed frame, you will need “extension brackets” or a “conversion plate” kit. These kits provide additional length or width, allowing the bed frame’s narrower attachment points to reach the headboard’s wider connection points.
Q. What are common troubleshooting issues when connecting and how can I resolve them?
A. Common issues include misaligned holes (use universal brackets), loose connections leading to wobbling (tighten all bolts with washers), or bolts that are too short/long (replace with correct size from a hardware store). If the headboard is too low or high, check if your frame’s brackets allow for vertical adjustment.
Related Articles
7 Top Full Size Bed Frames: What is the Dimensions of a Full Size Bed Frame and More!
Getting a good night’s sleep often starts with the right bed, and for many, a full-size bed is the perfect sweet spot between a twin and a queen…
How Much Is a King Size Sleep Number Smart Bed
How Much Is a King Size Sleep Number Smart Bed? Your Guide to Understanding the Investment Recommended Product: Select Comfort Air Bed Chamber for Sle…
How Much Does a Sleep Number 360 Smart Bed Cost
How Much Does a Sleep Number 360 Smart Bed Cost? Recommended Product: Sven & Son Classic Adjustable Bed Base — head and foot lift, massage, under-…